WordPress, in contrast to many other website builders, is totally free to use and customize. Additionally, because it is open-source, programmers are continually producing fresh themes and plugins to improve its capabilities.
It is easy to use:
Even individuals without technical knowledge may construct and administer their own website because WordPress is intended to be simple to use. It’s a fantastic choice for novices because of its user-friendly layout and adjustable features.
It is adaptable:
WordPress is very versatile and lets users build any type of website they can think of. WordPress provides the capabilities to enable you to develop a blog, an e-commerce site, or a portfolio.
It’s SEO-friendly:
Because WordPress was designed with search engine optimization (SEO) in mind, it’s simple to optimize your website for better search engine ranks. To increase traffic and reach a larger audience, this is crucial.
It has a strong community:
WordPress has a sizable and vibrant developer and user community, therefore there are many resources and support options accessible. The community has your back whether you’re searching for assistance with a specific problem or simply want to connect with other WordPress lovers.
These are only a few of the factors that influence people’s decision to use WordPress for their websites. It’s definitely something to think about if you’re seeking a strong and welcoming platform!
WordPress speed optimization is crucial if you want to increase your page traffic and revenue. It is most probable that one would prefer a fast website experience than a slower site. No matter how informative your website is, you will lose visitors if it doesn’t offer speedy surfing. So it is only logical that you would want to optimize your WordPress websites for fast loading to keep maximum traffic. In this article, we have put together everything you need to know for speed optimization.
To boost your WordPress speed you need to know a couple of things first. Like, as how to check your site’s speed and why is your website slow in the first place. But do not worry. From plugins to protips, we’ve covered it all, so let’s get started.
Importance of WordPress speed optimization
In this era of TikTok and YouTube shorts, attention span of people is rapidly decreasing. A huge number of users stated that they would leave the page if it took longer than 3 seconds. Speedy performance will not only keep visitors coming, but it will also be a factor in your site’s ranking.
Each second delay can cost you your favorite spot on SERP. Additionally, you can face up to
a 7% drop in conversion rate
a 11% fewer views per page
a 16% decrease in Customer satisfaction
and a 40% bounce rate.
So it is a no-brainer that you must increase WordPress speed if you care about page traffic and revenue.
How to Do WordPress Site Speed Test?
Many times, site owners don’t understand that their sites are slow. It might be because modern browsers save caches and information in your devices to load up faster. But for first-time visitors, it won’t be the same, which is why it is important to test multiple times and from different locations. Try to consider the mobile phone perspective while testing the sites. Also, notice if your website caching is turned on and if your content delivery network is working. Taking care of these factors will save milliseconds here and there. For basic speed, testing try to perform a total loading time analysis by
Testing the page loading speed.
Calculating the initial loading time of your website
Inspecting page size
Examining your WordPress themes and plugins
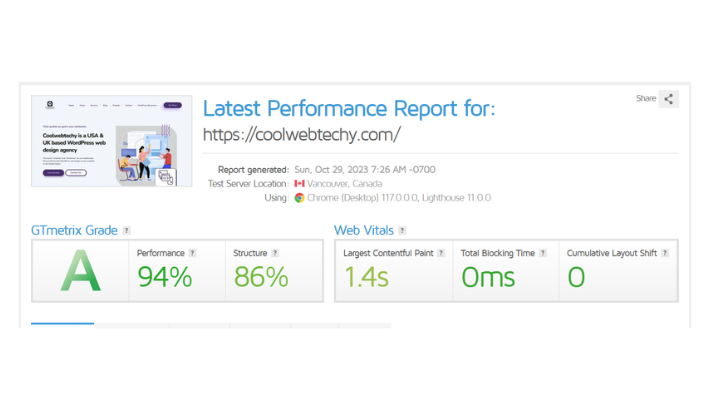
There are also some metrics to look into. They are called website performance metrics. CLS, FCP, FID, LCP, TBT, and TTI scores are some important metrics. But these metrics are technical in nature and can be hard to understand for many. Which is why various tools are available to test your sites’ performance and speed. Some of the tools are:
i. GTmetrix
ii. Google PageSpeed Insights
iii. Pingdom
iv. WebPageTest
Why Your WordPress Site Is Slow?
WordPress is the most popular as over 43% of sites are powered by it. But this popularity also increases its load making it harder for sites owner to speed up their sites. But understanding why your WordPress site is slow can be the first step toward right direction. Some reasons are:
• Malware:
Malware can significantly slow down a website’s speed by consuming server resources. It also makes the site open to new hacks and attacks.
• Bad web host:
Bad web hosting can slow down your sites. If you share the server resources with many other customers, your sites can get slower when your adjacent site receives a lot of traffic.
So, it is best to go with managed hosting because you will receive optimized server configurations that will speed up your WordPress site.
Too many plugins, low-quality plugins, and themes are another hindrance to speed optimization. Failing to update WordPress core, plugins, and themes can slow down your sites severely.
• Programming and Coding Problems:
Excessive JavaScript or lengthy CSS, or not using updated PHP also slows the sites down.
• Not optimizing images:
Not optimized and oversized images are slow to load. Images that are 5000px by 3000px are too large as most desktop screens are 1920 pixels wide, whereas mobile screens are only 700 pixels wide.
• No caching plugins:
Without a caching plugin installed, your WordPress site will overload your server. If it is not serving cached pages, it can make it slow or even crash. Adding such a plugin can speed up a WordPress website by two to five times.
How to boost your WordPress Page Speed?
Now that you know how important it is to speed up WordPress, and what might be the reasons your sites are slow, let’s discuss how to boost wordpess speed. Here are some basic tips you can follow to increase WordPress speed by seconds!
Continue to update your WordPress site. That means using the latest version of PHP and optimizing the database regularly.
Improve the Images on your website, and try to select a theme that is quick.
Use plugins with caution and when it is absolutely necessary. Load the essential scripts only.
Set up cache to improve your website and use a content delivery network. Fix HTTPS/SSL errors when WordPress warns about mixed content.
Minify the scripts and stylesheets on your website, and the admin dashboard HTTP external requests.
Server Configuration and Location Are Important. So, select a WordPress security service that is cloud-based. Get rid of pointless URL redirects
WordPress page speed optimization by Caching
We have already mentioned how important caching is to speed up WordPress. It reduces the load on hosting servers and makes WordPress sites run faster by limiting data transfer between site visitors’ browsers. You can do it by using plugins or by leveraging browser caching.
How to use WordPress Caching Plugins
WordPress caching plugins are essential tools for optimizing the speed of your website. These plugins work by creating a cached version of your pages, which is then served to your visitors instead of generating the pages from scratch each time they are loaded. This reduces the load on your server and results in faster page loading times. In this article, we will explain how to use WordPress caching plugins to boost the speed of your website.
Step 1: Choose a plugin
The first step in using a WordPress caching plugin is to choose the right plugin for your website. There are many caching plugins available, and some of the most popular include WP Rocket, W3 Total Cache, and WP Super Cache. Consider factors such as your website’s traffic, the size of your site, and your hosting environment when choosing a plugin.
Step 2: Install and activate the plugin
Once you have chosen a plugin, the next step is to install and activate it on your WordPress site. To do this, go to the “Plugins” section of your WordPress dashboard and click “Add New.” Then, search for the plugin you want to install and click “Install Now.” After the plugin has been installed, click “Activate” to start using it.
Step 3: Configure the plugin
Once the plugin is activated, you need to configure it to optimize the speed of your website. The configuration options will vary depending on the plugin you choose, but some of the common settings include enabling caching for specific pages, setting an expiration time for the cache, and minifying CSS and JavaScript files. Be sure to carefully read the documentation for your plugin to learn about all of the available options and how to configure them.
Step 4: Test your website
After you have configured the plugin, it is important to test your website to make sure that the caching is working correctly. You can use tools such as GTmetrix or Pingdom to measure the load time of your pages and compare the results before and after enabling caching. If you encounter any issues, be sure to consult the plugin’s documentation or support forum for help.
Step 5: Monitor the plugin
Finally, be sure to regularly monitor the performance of your WordPress site with the caching plugin enabled. Keep an eye on the load times of your pages and check for any errors or problems that may arise. Make any necessary adjustments to the plugin’s configuration to ensure that it continues to deliver optimal performance.
Bottom Line
Building your website using WordPress also includes optimizing it for better speed. We understand it can be overwhelming. Especially because there is no clear option for speed in WordPress. If you are a beginner, we hope this article would help get started in the world of WordPress optimization. There are many aspects of WordPress speed like image optimization, google page speed factors, etc. If you need help with those or any other assistance regarding WordPress speed optimization, our experts are here to help. Reach out to us if you have any specific question that isn’t answered on Coolwebtechy.
The need for SSL certificates has recently experienced a drastic shift on WordPress websites. It was in the coming as SSL certificates can be a crucial ranking factor for WordPress websites. That said, the free options provided by Cloudflare gave breathing space to most WordPress users.
Is Cloudflare SSL certificate safe? Yes, there are almost zero reasons to worry about when you hook your WordPress website with a Cloudflare SSL certificate. It eventually plays a massive part in boosting website performance with the help of its content network.
In this article, you’ll learn the ins and outs of free SSL certificates from Cloudflare and the process of setting it up. Therefore, let’s jump right into the write-up without wasting a moment.
What is Cloudflare’s free SSL certificate on WordPress?
An SSL certificate is a type of data file that uses asymmetric cryptography. This process uses public and private keys to establish an encrypted link.
That said, the certificate has the website owner’s details along with the public key. With the Cloudflare free SSL certificate, you’ll get the universal SSL certificate and support for the community forums. Cloudflare will provide security to your site as long as you use its content delivery network.
Why would you need an SSL certificate on your website?
The primary function of an SSL certificate is to strengthen the security of connection in any WordPress website. It helps to secure your information on the WordPress site and prevent any kind of data theft.
Here the process of protection takes place in two ways: data encryption and identification. Encrypting the data in the website will be just plain text to read. On the other hand, identification provides technical assurance about the website’s authenticity.
The Cloudflare free SSL certificate enables WordPress website owners to use it repeatedly. You’ll be able to create a free account and use the SSL features for free. Besides, the Cloudflare free SSL certificate will be suitable for regular blogging websites, which makes it an ideal setup for small, less complicated websites.
Lastly, Cloudflare’s free SSL certificate differs from other contemporaries in renewal. Unlike most other free SSL certificates, it has an auto-renewal feature. That said, when you have the Cloudflare free SSL certificate on your WordPress site, it will automatically renew after three months.
Paid vs. Free SSL Certificates: Which is better?
Cloudflare offers the option to avail of both the paid and free plans for SSL certificates. The free one offers enough scope for making the WordPress site rank.
But there often needs to be more clarity about whether the free certificates offer more value than the paid ones. Below here are some of the factors that will clear this dilemma.
Renewal
When it comes to the free SSL certificates from Cloudflare, it gets auto-renewed after 90 days. The same goes for the paid certificates from them. But for other contemporaries, the auto-renewal feature is absent for the free certificates.
Installation
With the free SSL certificates, the installation procedure is much easygoing. The sourcing and installation on the website will just take a while in a straightforward process.
In the case of paid SSL certificates, there are often some formalities and assurances to deal with. As a result, it’s always crucial to select providers that speed up the process.
How to set up a Cloudflare SSL certificate for free on WordPress?
The process of setting up the security certificate is very easygoing and convenient. In the complete process, there is no need to renew the certificate as it can be processed automatically. Whether you’re a beginner or an experienced webmaster, this guide will walk you through the process of setting up a secure and reliable SSL connection for your website with Cloudflare.
Below, we have added some steps to help you set up the free Cloudflare SSL certificate.
Step 1: Add your WordPress site to Cloudflare
The initial step would be to add your WordPress site to Cloudflare. To do so, follow the directives mentioned below:
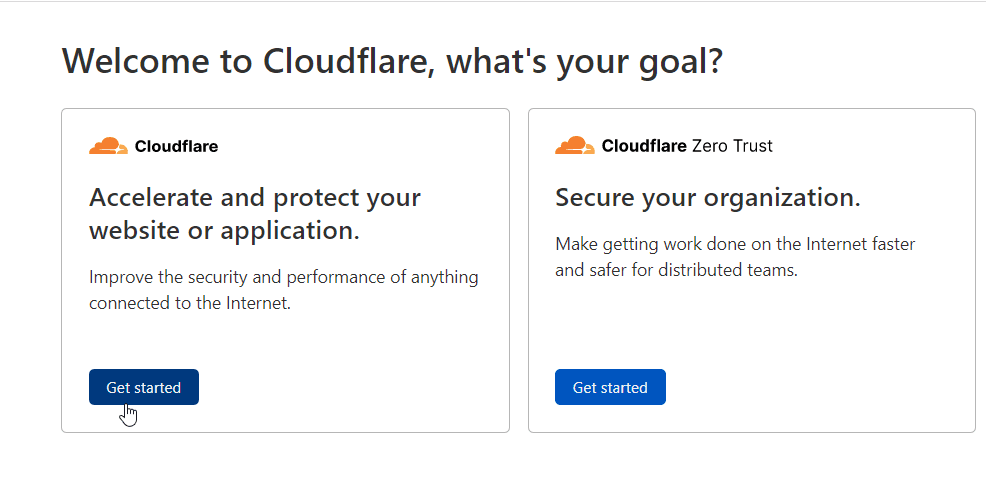
⦿ Use your email address to sign up for a Cloudflare account
⦿ Click on the Websites or Application option when the account is created
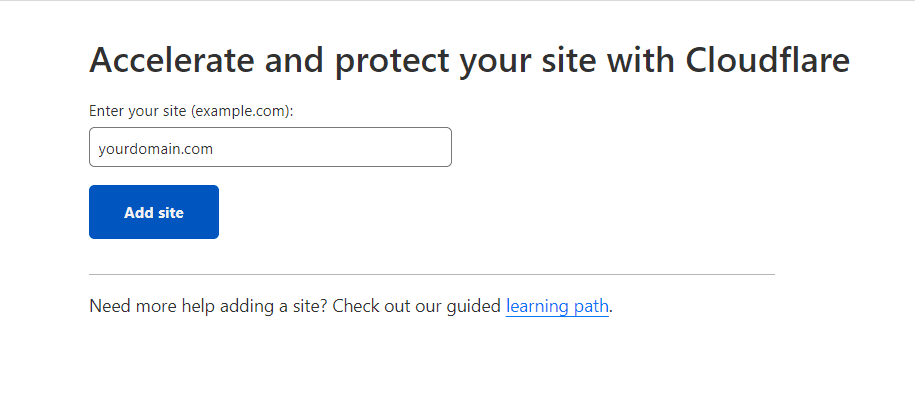
⦿ Input the website URL and tap on Add Site
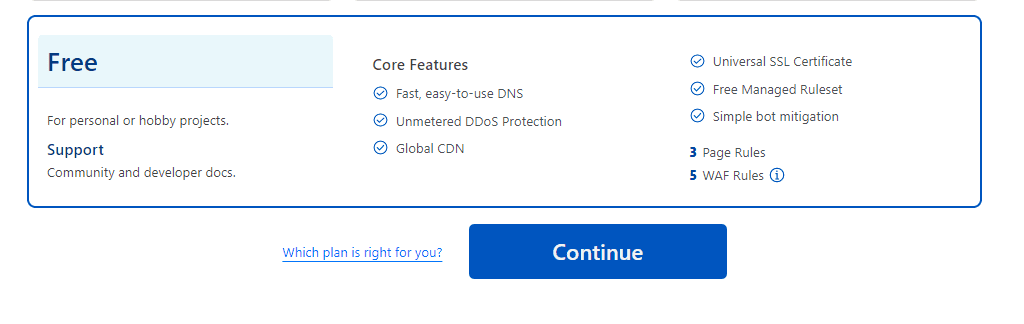
⦿ Select the Free plan, and then click on the continue option
⦿ Click on Continue
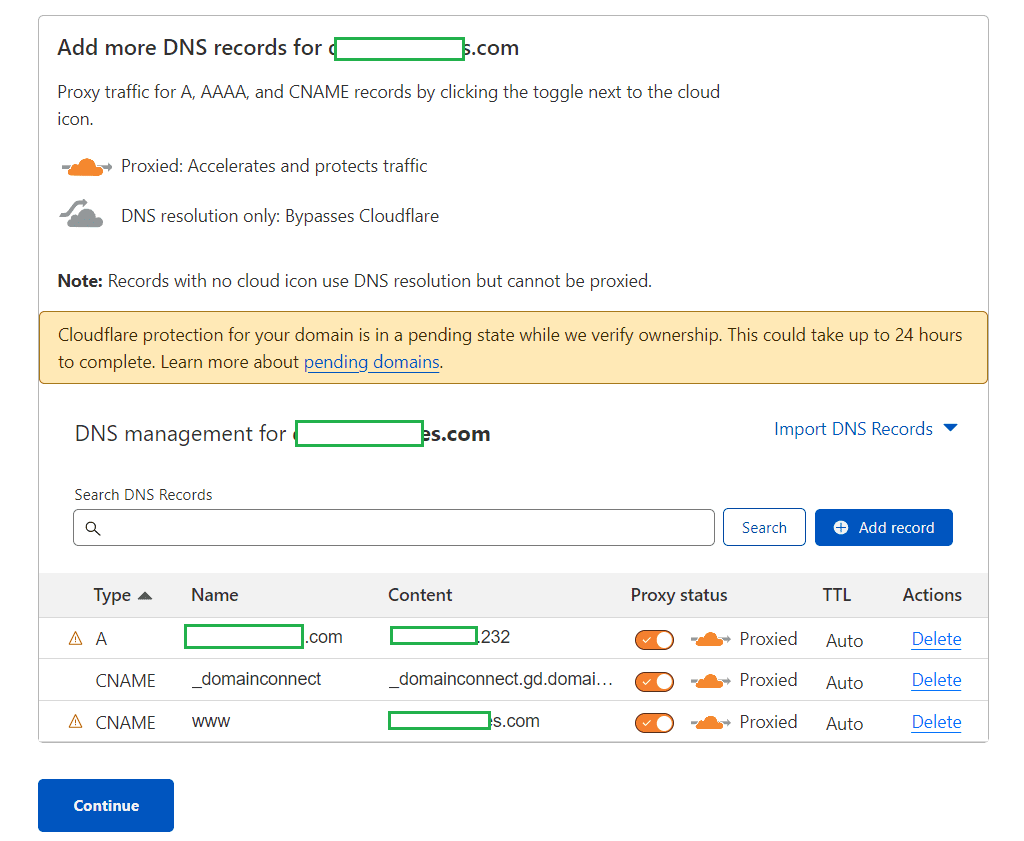
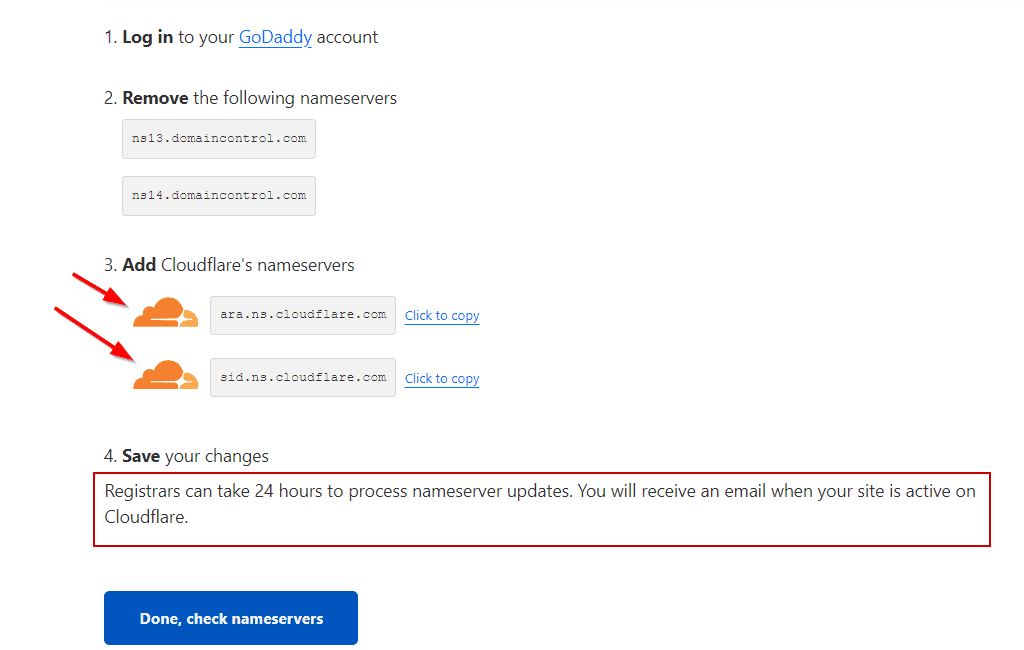
⦿ Update the domain registrar website with the New nameservers given by Cloudflare
⦿ After updating, click Done and check nameservers
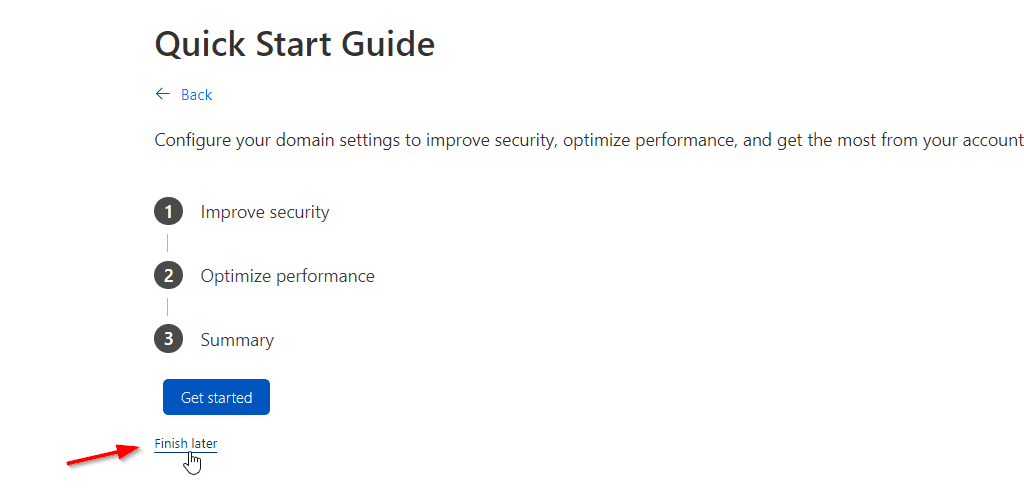
⦿ Click on Finish Later
Registrars can take 24 hours to process nameserver updates. You will receive an email when your site is active on Cloudflare.
Step 2: Configure SSL certificate on Cloudflare
After completing the initial step, you should look forward to enabling an SSL certificate on Cloudflare. The procedure for this is explained below:
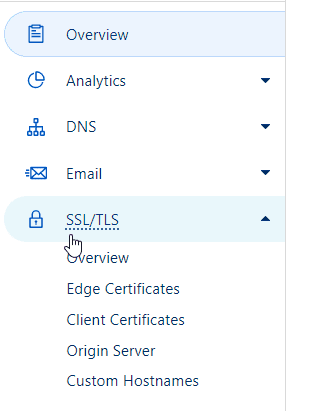
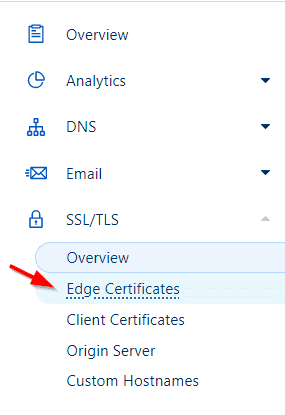
⦿ Navigate to SSL/TSL
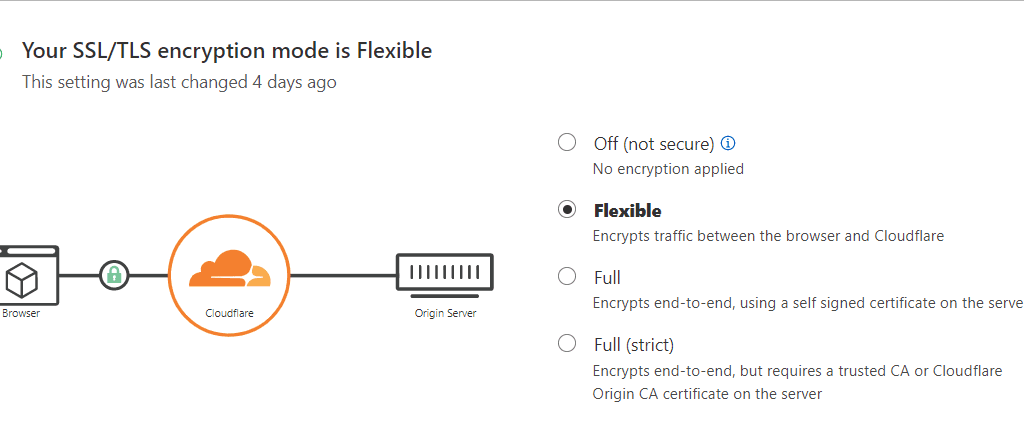
⦿ Cloudflare will select your mode (Flexible/Full/Full Strict) depending on the hosting settings
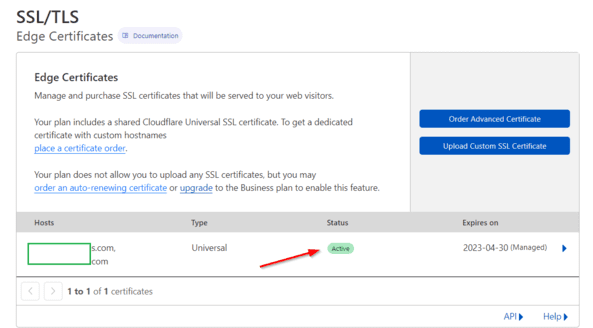
⦿ View the SSL status by navigating to the Edge certificate
⦿ Once you view the status as Active, you’re OK to go with
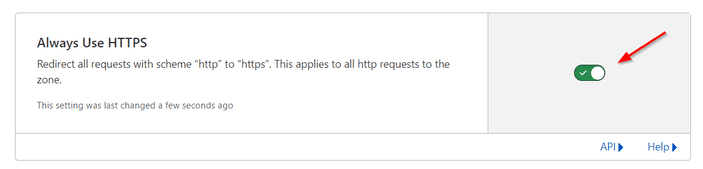
⦿ Locate the option Always use HTTPS by scrolling down and turn it on after you find it
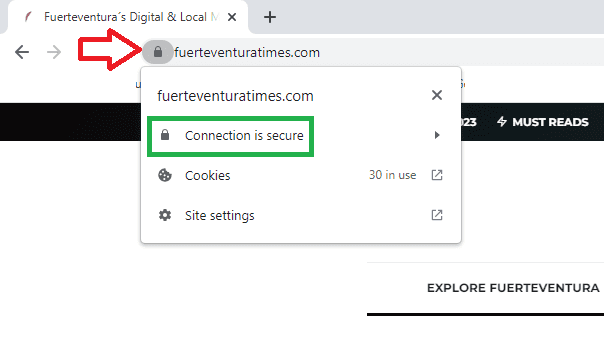
⦿ You’ll see that the WordPress site is secured by an SSL certificate when you’re done with the process
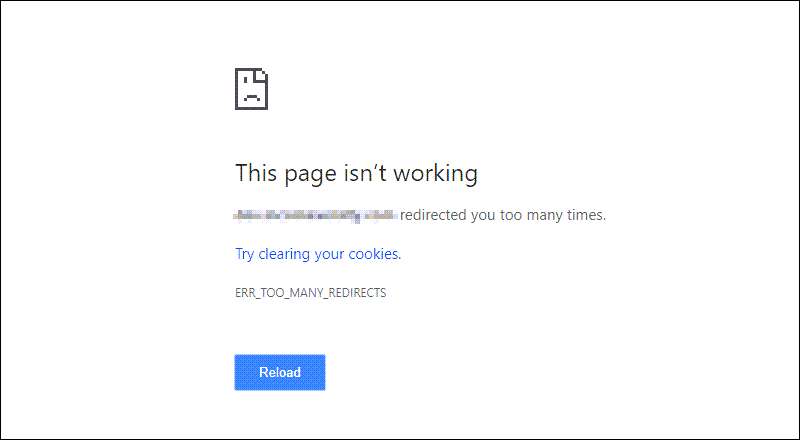
⦿ If you see ERR_TOO_MANY_REDIRECT, revisit SSL/TLS and change the mode
Step 3: Configure SSL on WordPress (Additional)
Navigate to Plugins and then to Add New
Install and activate the ReallySimpleSSL plugin
FAQs
Setting up the free SSL certificate on your WordPress website may invoke a lot of queries. Some of the most asked questions are listed below for your convenience:
Is Cloudflare free SSL unlimited?
Yes, Cloudflare’s free SSL is unlimited. The validity of the free SSL certificate might be 90 days, but the auto-renewal feature makes it unlimited for usage.
Are free SSL certificates good enough for WordPress?
The Free SSL certificates are very good for almost all kinds of websites, such as usage in the blogging website, e-commerce, etc. Therefore, for most WordPress sites, you won’t need to worry about it.
Do I need to create a Cloudflare account to get a free SSL certificate?
The first step of adding a Cloudflare free SSL certificate to your WordPress website is signing up for the account. It’s a simple process, and once you go to the Cloudflare website, you’ll be redirected to it.
Final Thoughts
To secure your WordPress website and make it potent enough for ranking, SSL certificates are crucial. Since you are looking for free certificates, Cloudflare can offer you the most viable plan.
With its content delivery network integration, it does a superb job of encrypting your site. In this article, we’ve added the step-by-step process to help you set up the certificate.
Moreover, our goal was to help you understand the ins and outs of setting up an SSL certificate on your WordPress website. We hope we were successful and for any relevant queries regarding WordPress SSL, feel free to reach out.